Taiga Hat Tutorial: Knitting Jogless Colorwork in the Round
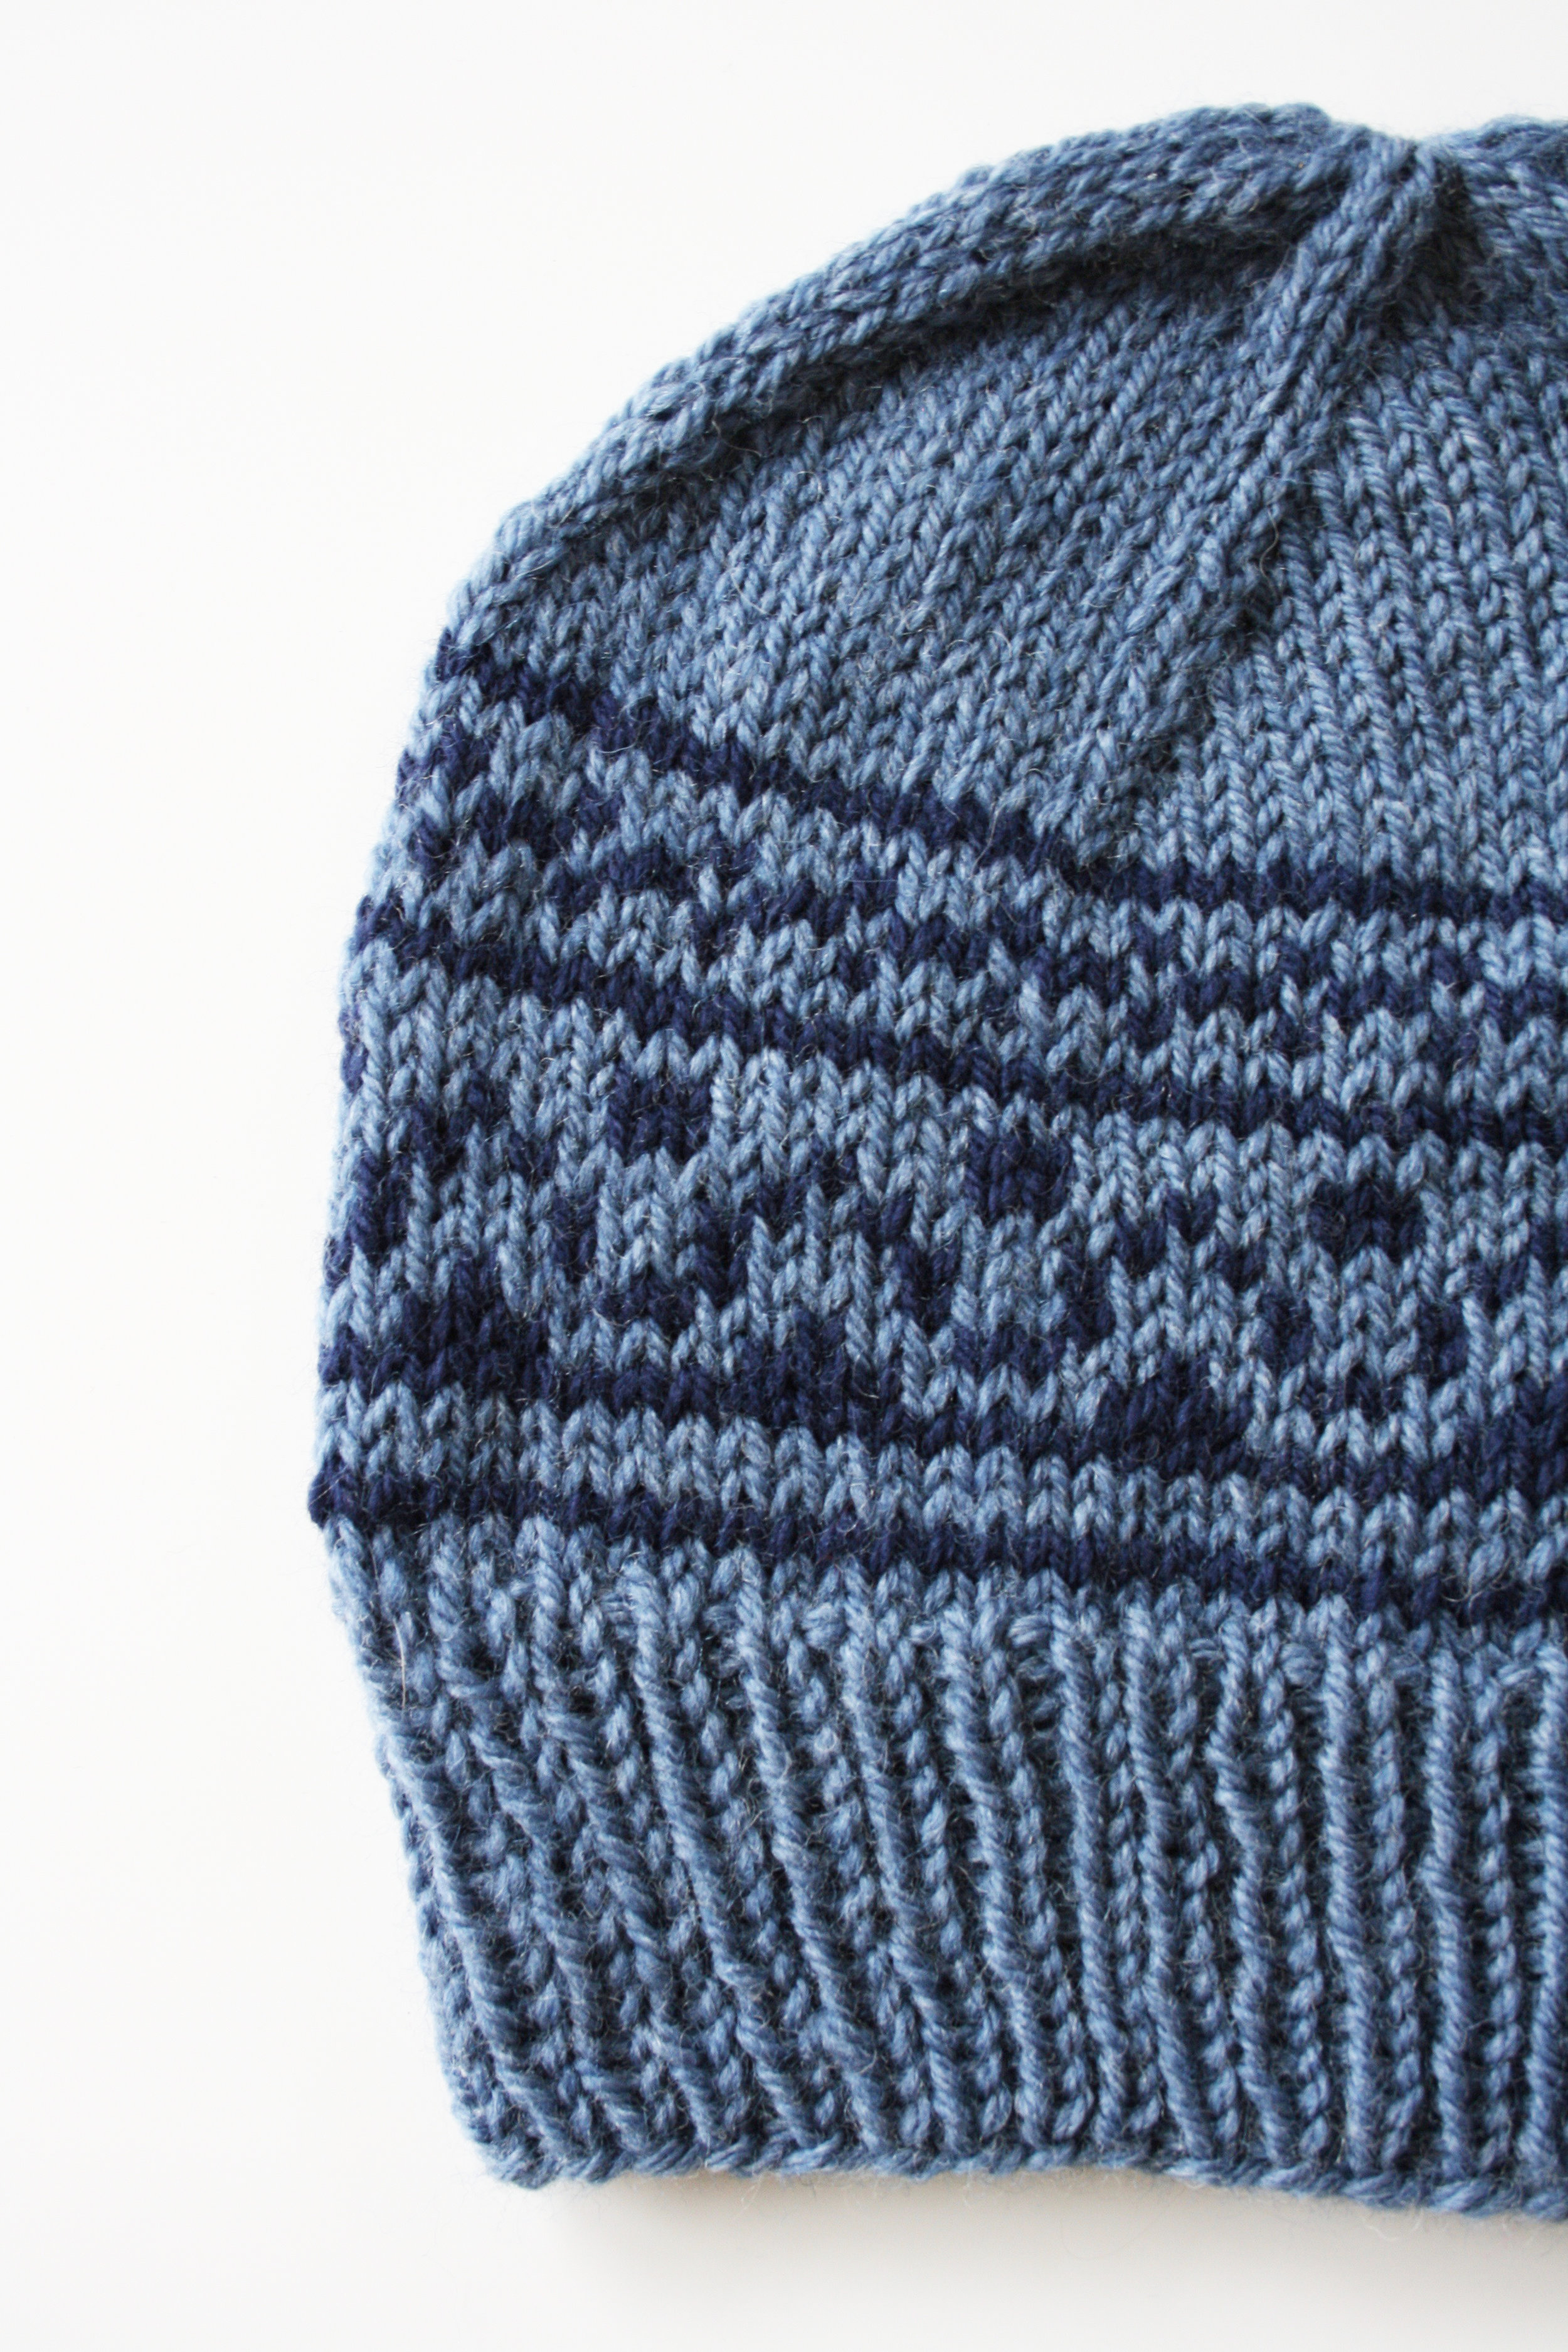
The third design in my Topography hat pattern collection is Taiga, a beanie-style hat worked up in worsted weight wool that features a stunning colorwork pattern around the body of the hat. It is the second colorwork design in the collection after Architrave.
I designed the Architrave hat pattern to be very beginner-friendly, using simple stockinette and a syncopated colorwork design that doesn’t require any techniques or adjustments to make the pattern look as it should. Taiga is also approachable to beginners but because the colorwork is continuous, a slight adjustment technique is recommended to fix the inevitable color jog.
So, I put together a simple step-by-step tutorial for this cool knitting trick that will help make your Taiga hat look flawless! This tutorial is included in the pattern, but I wanted to make it available for anyone looking to add this technique to their repertoire.
Get the patterns here:
Knitting “jogless” colorwork in the round:
When you knit in the round, you are knitting in a continuous spiral. When worked in one color, the transition from row to row isn’t noticeable. But when working different colors, the stitch at the end of the row will be stacked slightly higher than the stitch at the beginning of the row, creating what is referred to as a color “jog.”
to avoid this jog, there is an easy technique you can employ that helps to straighten out the line between the first and last stitch. It doesn’t make the row perfectly straight, but it makes the transition much less perceptible, and gets even better after blocking.
Before starting this tutorial, follow the pattern for Taiga up until the first colorwork round. After completing the first round of color change, you are ready to learn to fix the color jog.
Step 1
step 2
Complete one round of colorwork knitting every stitch in the round. slip the beginning of row marker from the left-hand needle to the right-hand needle.
step 3
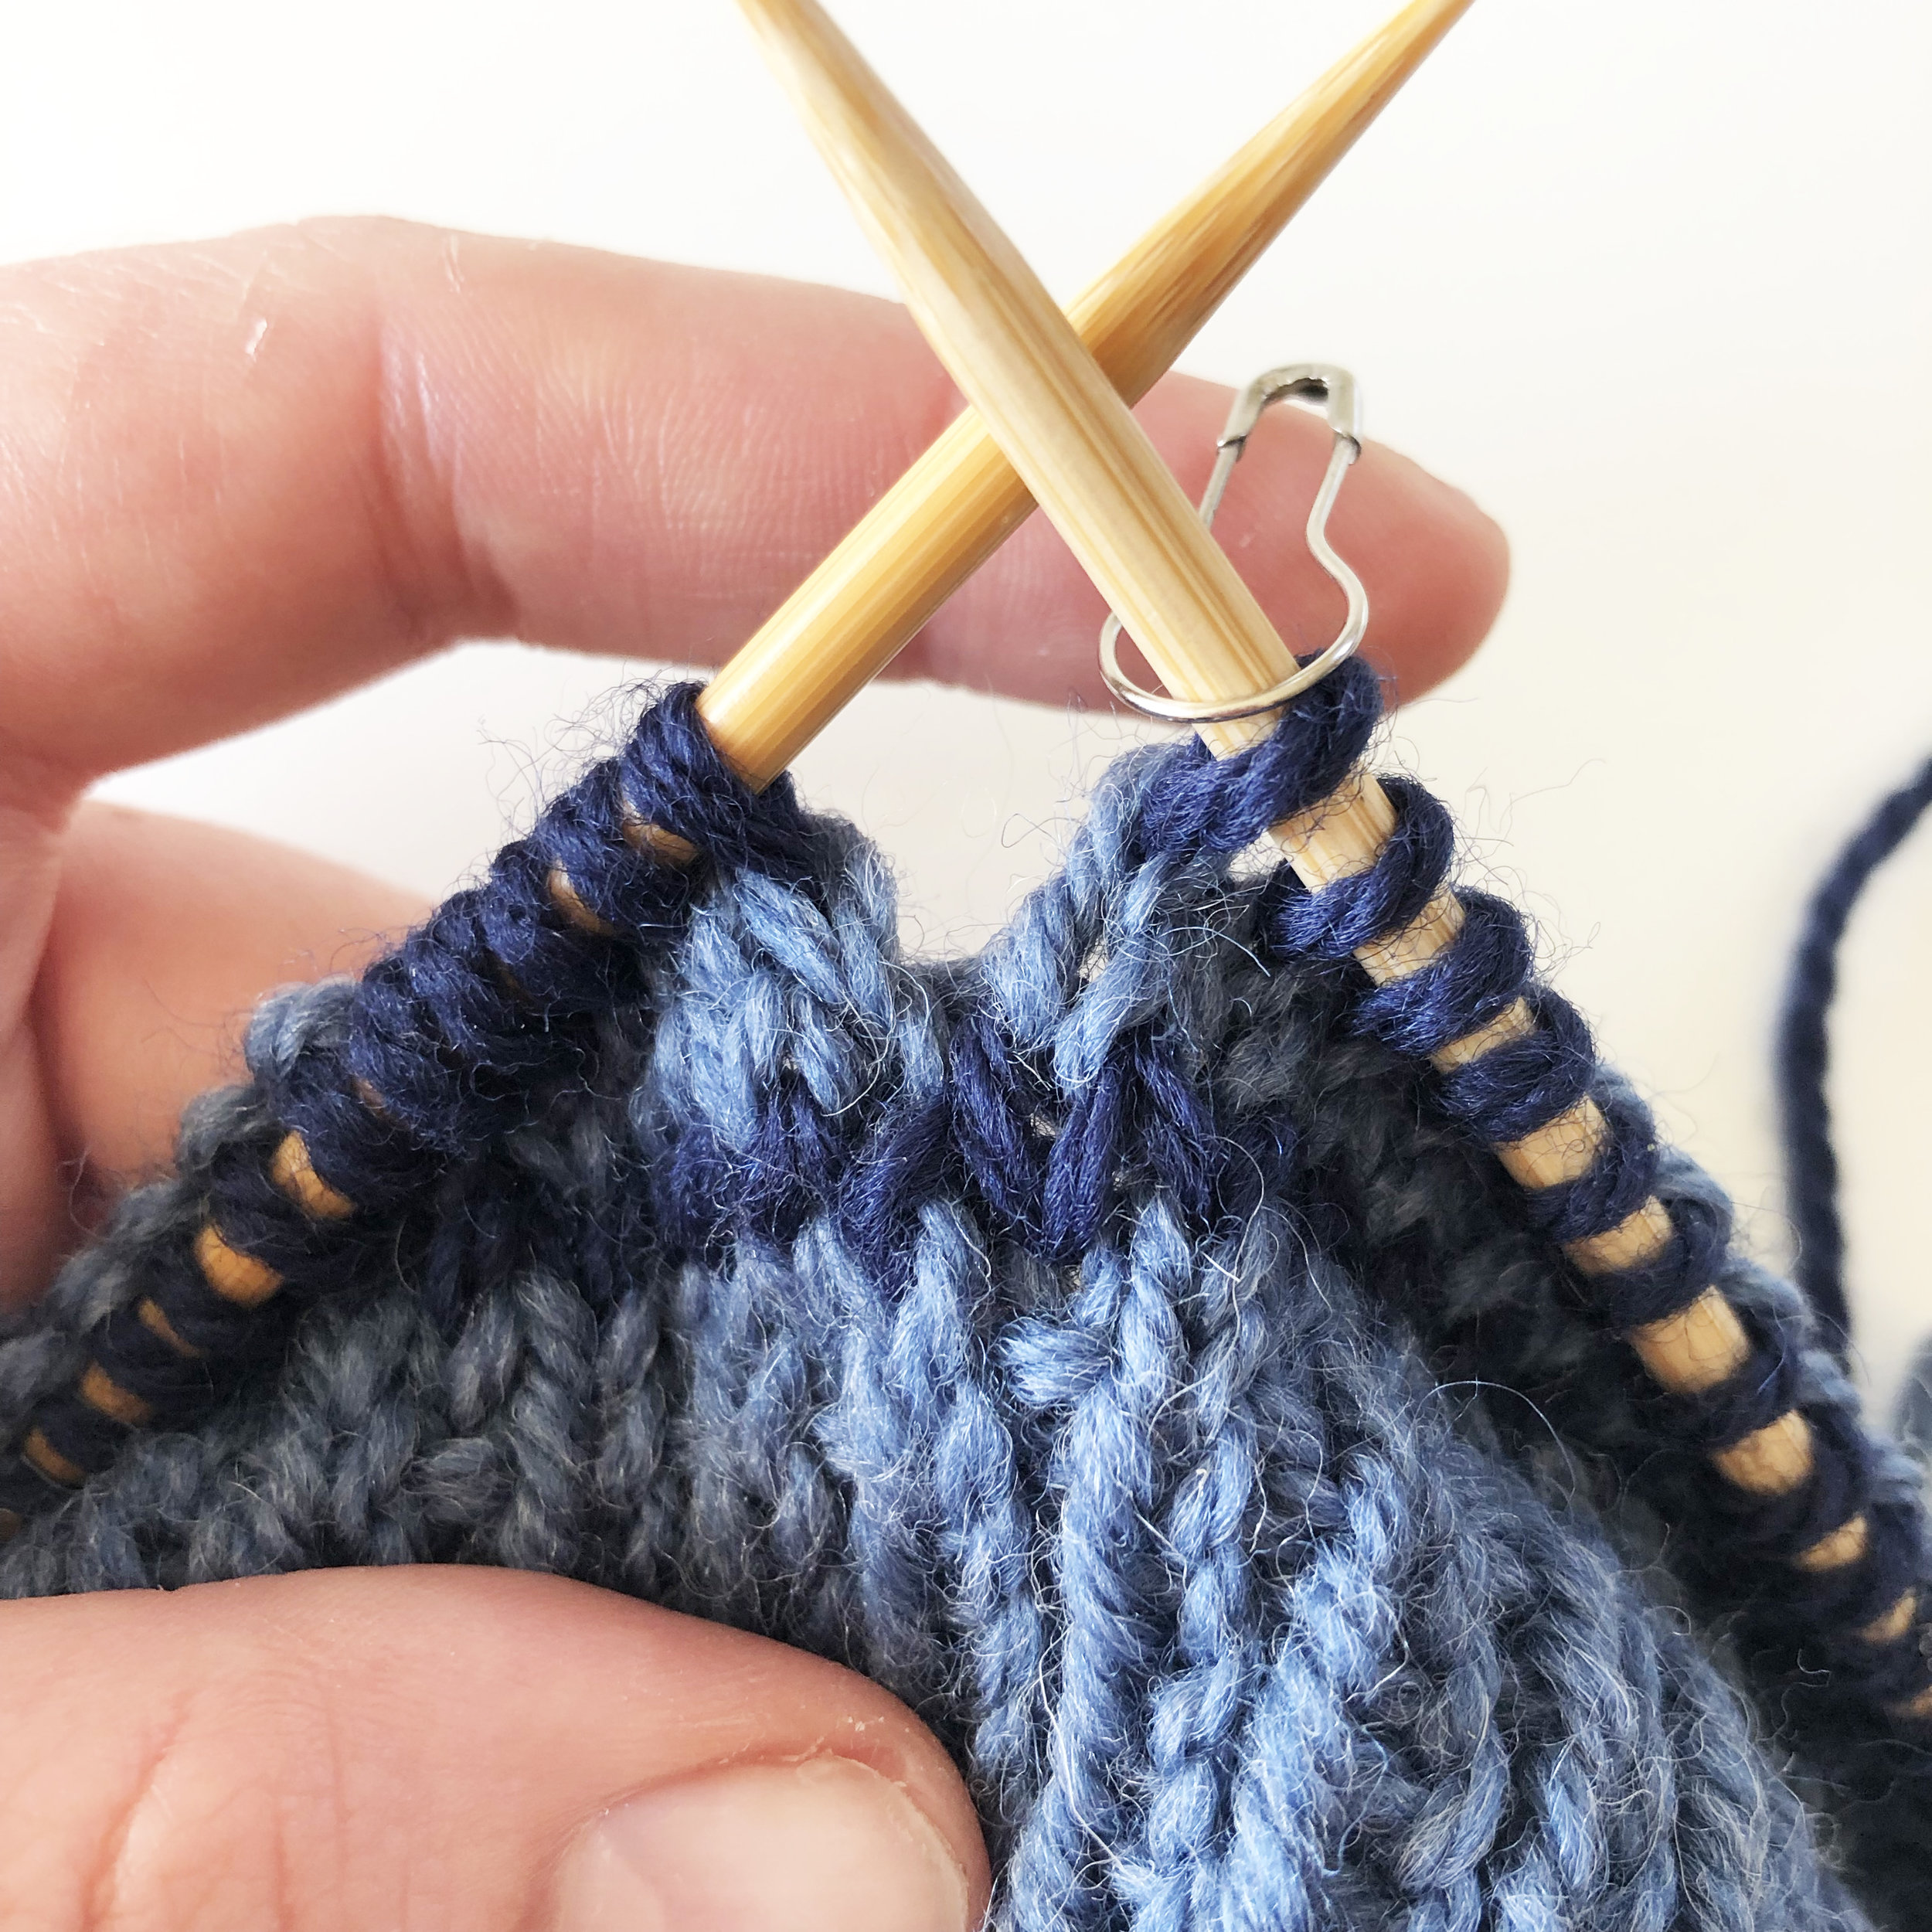
Slip the right-hand needle purl-wise into the right leg of the stitch below the first stitch on the left-hand needle.
basically, you are going to work the first stitch of the round that came before the colorwork round you just knit.
step 4
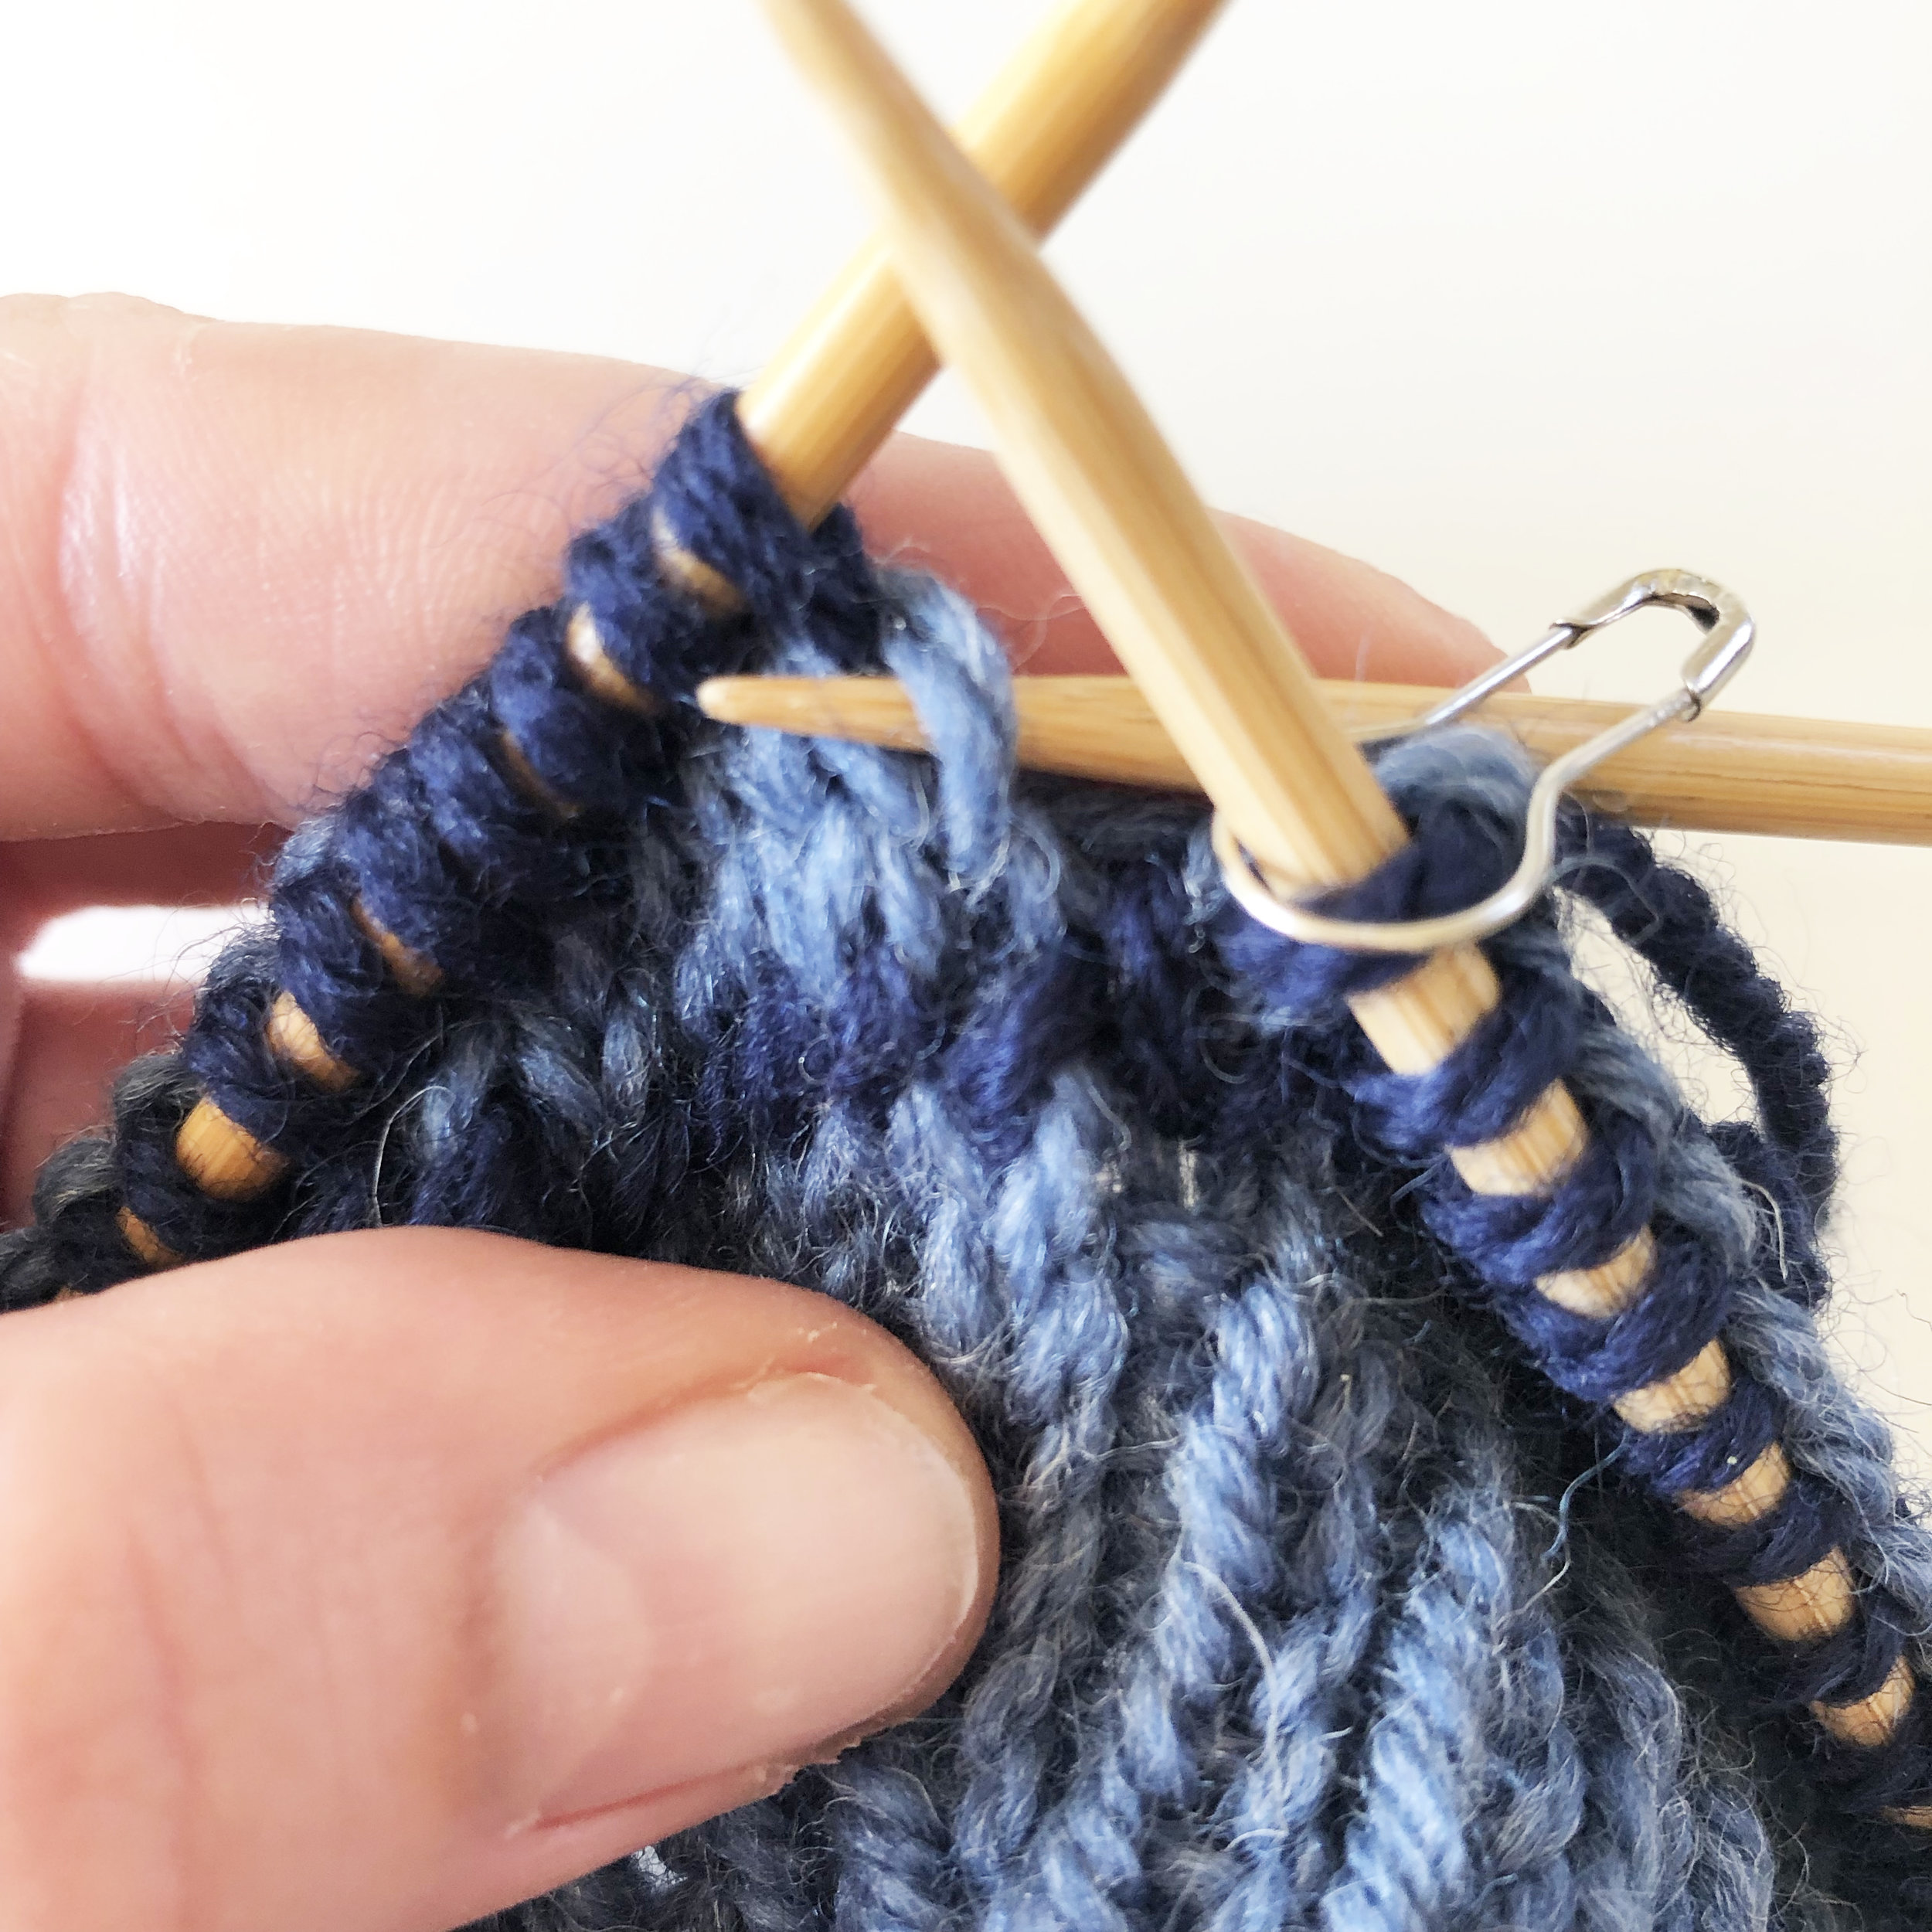
use the right-hand needle to lift the stitch up and onto the left-hand needle.
step 5
Knit these two stitches together, using the same color as the colorwork round.
slip the newly-knitted stitch back onto the left-hand needle.
You are now ready to begin the new round (in a new color)!
that’s it! the technique is very simple and easy and makes a great fix when doing colorwork in the round. Happy Knitting!


